Thursday, December 27, 2012

If life gives you snow, make Ice cream!


 Snow Ice Cream Recipe 


1 gallon or big bowl full of snow

1 cup sugar
1 tsp vanilla extract
1 cup cream or milk


Again, just mix the ingredients together. You get the idea.


Tuesday, November 20, 2012

Monsters under the bed? This may help..


Homemade monster spray is easy enough to make and can put a quick end to bedtime monster concerns.  This strategy's effectiveness is dependent on the child (you know your child's personality best) and your powers of persuasion.  There are two main types of homemade monster spray.  
One is using a scented spray such as room air freshner or body spray.  Print off a quick label on your computer clearly marking it as monster spray and then introduce to your child.  Some parents prefer scented because children can feel better protected when they smell that it's "working."  Simply spray in corners of the room, under the bed & in closets. Do not give to children to spray. 

     The other common monster spray recipe is adding a small amount of food coloring to bottled water.  Be careful not to add too much as food coloring can stain--you can add a small amount of washable children's paint to color the water as well.  Again, clearly mark the bottle with a picture of a monster crossed out or the words monster spray.  Parents often give this spray to their children as a weapon of sorts.  If they see any monsters, the child can spray them and the monster will disappear.  Give the bottle to your child and let the hunting begin!

Wednesday, October 17, 2012

My journey with Tink

  When I found out I was having a girl, I was so happy.  We could do all the mother/daughter things together, like do our hair, go shopping or have pretend tea parties.. All those dreams were crushed.. .

Tink's milestones were delayed... She sat up at 9 months old, took her first steps at 15 months and said her first words at 2 all because of low muscle tone. 

Tink at her first birthday party.

   With the help of early intervention and speech therapy, She learned her name at 3. Tink was daytime potty trained by 3 1/2 (still remains in diapers at night). Although she had all these delays, she did have very interesting strengths..  Tink learned to pump on swing all by herself, coloring in the lines (mostly) & cut with safety scissors all at 2 1/2 years old, She would do these things for hours.. 

4 yrs old lining-up toys

 Sensory sensitivities: TOUCH- although she likes being hugged, it has to be on her terms. She never likes her hair brushed, she cries and says I'm being too rough. Certain clothes bother her, such as Jeans (she says they're too hard), anything with a tag is itchy to her. SMELL - She is always the first and sometime the only one to smell something. HEARING - She is sensitive to loud or sudden sounds (she'll cover her ears). TASTE - She has certain food she will refuses to eat such as cooked carrots, yet will overeat to the point it make herself sick if she is not watched. SIGHT- She doesn't like people looking at her. She says"What?"as a way of saying stop looking at me.. Yet she'll stare, almost gets fixated with others and what they're doing.

Has a hard time with being "put on the spot".

Socializing with others: Tink had no close friends, she has classmates she may talk to during school hours, but when she came home she is mainly on her own. She tries to play with her siblings, but it soon turns into an argument. She does play dolls (she called it the baby game), but it's more like role play (reliving something she has seen). She prefers to be with adults than her peers. Her favorite people to be with are "Horsey"(her grandmother) and certain teacher's aides. When we ask her what she did in school that day it's hard for her to tell us. We enrolled her in dancing school to help her with socializing, but it was very very stressful for her.  She also has a hard time understanding body language. (personal space)

At 8 years old, Tink was diagnosed with ADHD and was put on medication.  That's when I noticed a new obsession, patterning and charting just about everything she could find. For example: She would place a chart on a door, she would then tell us make a checkmark when we would enter or leave that room..   To me this was a red flag.. I started documenting her "play".
 
Age 7 using hair ties as a tool to make a pattern with her dolls.

Age 9 Lining-up cars at "Horsey's" house.


With all this said.. I think it's some a form of Autism.  I have been on this journey with Tink for almost 10 long years and still no diagnosis. Why? Because girls with autism often present with a unique set of characteristics that can make diagnosing their autism difficult. Furthermore, their set of strengths can mask their deficits. 
I just want her to be happy and to be able to live her life to the fullest! 

UPDATE: Tink has a series of appt with a developmental pediatrician starting on the Nov 27, 2012. A bittersweet moment!

UPDATE: 1/8/2013 Tink's developmental pediatrician/autism spectrum evaluation appointment went very well today - preliminary diagnosis was encouraging, but we'll need to wait until next week for a definitive diagnosis. Maybe then we'll be able to get refined support services, and help her transform and achieve!

UPDATE: 1/15/13 Tink was officially diagnosed with ASD2.  

UPDATE: 6/1/2014 - I just wanted to post one last update. Tink has been doing great! She works with a Behavioral Health 3 days a week and has OT every Monday. She still has her bad day's but is working really hard to succeed. To continue to follow her journey, go to Welcome to Holland

Saturday, April 21, 2012

Important Info About Clothes Dryers..


The heating unit went out on my dryer! The gentleman that was fixing it told us that he wanted to show us something and he went over to the dryer and pulled out the lint filter. It was clean. (I always clean the lint from the filter after every load clothes.) He told us that he wanted to show us something; he took the filter over to the sink, ran hot water over it. The lint filter is made of a mesh material – I’m sure you know what your dryer’s lint filter looks like.
WELL…the hot water just sat on top of the mesh! It didn’t go through it at all! He told us that dryer sheets cause a film over that mesh that’s what burns out the heating unit. You can’t SEE the film , but it’s there. It’s wha t is in the dryer sheets to make your clothes soft and static free – that nice fragrance too, you know how they can feel waxy when you take them out of the box, well this stuff builds up on your clothes and on your lint screen This is also what causes dryer units to catch fire & potentially burn your house down with it! He said the best way to keep your dryer working for a very long time (& to keep your electric bill lower) is to take that filter out & wash it with hot soapy water & an old toothbrush (or other brush) at least every six months. He said that makes the life of the dryer at least twice as long!

Wool dryer balls ~ This what we use now!

How about that!?! Learn something new every day!  I thought I’d share!

Note: I went to my dryer & tested my screen by running water on it. The water ran through a little bit but mostly collected all the water in the mesh screen. I washed it with warm soapy water & a nylon brush & I had it done in 30 seconds. Then when I rinsed it the water ran right thru the screen! There wasn’t any puddling at all! That repairman knew what he was talking about!
17 Tips To Make Your Life Easier

Saturday, January 28, 2012

Stinky Diaper Pail? Make Your Own Deodorant Disks for the Diaper Pail


Most diaper pails have a place for a deodorant disk in the lid. You can make those disks yourself either by soaking heavy paper (preferably with rag content) in oil or by using a caked baking soda base. The baking soda disks will become very crumbly, at which point you can add them to the wash and put a new disk in the pail lid.


For baking soda disks, you will need:
  • distilled or boiled water
  •  2 cups of baking soda
  • your choice of essential oils 
  • a muffin pan
  • paper muffin cups

Add a few drops of essential oil to a small amount of water. Mix the water with the baking soda. Mix well. Gradually add and mix more water until you have a thick paste.
 Press about ½" of paste into each muffin paper and let dry 24 hours. Tear the paper off. After you've used each disk for a month or so (however long you find it effective), crumble the disk into the diaper wash. Baking soda deodorizes and softens the diapers.
This recipe made me a year supply. Happy Diapering! :) 

Tuesday, January 17, 2012

Broken Disney DvD?


I found this on http://gourmified.blogspot.com and I just HAVE to share!!!
I don't know about you, but we have had some problems with our DVDs getting broken or scratched by kids.  Yes. It happens.  Especially once you have little ones.  As an adult you can deal with the loss of a movie, but for a child, it's heart breaking.  Especially when it happens on accident and to a very LOVED movie.
 Well, I've found something absolutely INCREDIBLE that Disney offers!  If you go to the Disney Movie Rewards site at the very bottom of the screen there is an option you can choose "Guest Service Center".  That will get you to the Disc Replacement Program and the instructions and forms you need (Canadian help is available, too).  It only costs $6.95 per DVD. 
 Mail it out and about two weeks later, received this..brand new in the wrapper:
 See, if you didn't think Disney was incredible before, NOW you should really know it is!

I LOVE DISNEY!!!!!


Thursday, January 5, 2012

Adventures In Stripping Diapers


Even if you are careful to use less detergent and vinegar rinses, diapers still can get stressed and need periodic stripping.


Symptoms of diaper stress:


- Strong ammonia smell after they have been soiled.


- Diaper rash that won't go away despite diligent intervention.


Cause: Detergent residue which traps bacteria.


Solution: Boil (Strip) them.
**We use pocket diapers and I ONLY strip the inserts, Snaps & velcro can melt  and or the diaper's color can run.**
Start off with washing the inserts, they don't need to be dried. I spend a full day boiling all the cleaned inserts in a giant stock pot. It actually goes by pretty quickly.
 I can get about six - seven inserts in at a time. Add a little vinegar as well. This will help rid the inserts of detergent residue. I have also found a little bit of Dawn dish soap helps too.               Picture to the right: My little helper in her Ergo.... 


Bring the water to a boil, place the inserts in the pot.  I kept them boiling for about 8 minutes, then use a pair of tongs and transfer the "stripped" inserts to the sink (I used a metal bowl, Be careful it will be HOT)  
Then I add 6-7 more inserts the boiling water and start the process over again.   After 12-14 inserts are done, then you will want to change your water. 
Picture to the left: the suds are from the dawn soap


The inserts that are in the sink get rinsed down with cold water, rung out and set aside. Once all the inserts are done being stripped, I place them all in the washer for a washing cycle in just hot water and baking soda (baking soda neutralizes odors). Whenever you can line dry do it, The sun has a lot of benefits for diapers as well... 


Result: Extra clean sanitized diapers with no detergent residue, and no more rashes or bad smells. Good luck & Happy stripping!!


Wednesday, January 4, 2012

Crock Pot Orange Chicken recipe


Crock Pot Orange Chicken
(Recipe from Team T Adventures)

                         It was so easy!  Your family will love it.  It is a keeper!


Ingredients:
• boneless chicken breasts, chopped into small chunks (I used about 4)
• 1/3 cup flour
• olive oil
• 1/2 Tbl. salt
• 1 teaspoon balsamic vinegar
• 3 Tbl. ketchup
• 6 oz. frozen orange juice concentrate (thawed) UPDATE: Only use half of the can, Too strong with the whole can..
• 4 Tbl.  brown sugar


In a bowl, mix the orange juice, brown sugar, vinegar, salt, and ketchup.   Pour the flour in a small bowl.  Cover the chicken breast chunks in flour and shake off the excess.


Pour a small amount of olive oil in a skillet and brown the flour-covered chicken.
The chicken doesn't need to be fully cooked since it's going in the crock pot.

After the chicken is done cooking, pour the pieces into the crock pot. Then cover the chicken with your sauce mixture and give the pot a stir.

Cook on low for 5-6 hours or on high for 2-3.

Serve over rice and even add veggies if you want a healthier meal.

Monday, January 2, 2012

Soda Can (Beer Can) Coasters.

Simply empty out some cans of your choice and rinse them out with water.  Then take some tin snips and very carefully cut off the top and bottom of the can.  This can be a bit tricky.  


**But be very careful as these cans are super sharp!**  
I suggest wearing garden gloves while cutting to help give you extra protection.   Be sure to save as much of the flat part of the side of the can so that you can get a nice size square for your coasters.  Then cut down the seam of the can.  Most cans will have a definite seam on the side…usually by the ingredient list. Then I took some Silicone and put a good amount on the back of the square.  

I then attached them to some simple white tiles that measured 4 by 4 inches.  I found them at Lowes in the tile aisle and I believe they were $1.25 for four of then.  Flatten and rub the tin square so that it is securely attached.  Wipe any excess Silicone off the top of the tile with a damp warm cloth. Then I set a paper towel on the top of it and laid a pile of books on it and let them dry over night!  The next day I took a good amount Mod Podge glue over the top of it to seal it all off so that the edges would not peel up and to protect the edges from poking or scratching any users of the coasters. It will look cloudy, But will dry clear..Then simply place some felt pads on the bottom of the coasters to protect your table top from getting scratched!
Aren’t they fun?  I think they would be great to have in your TV room or game room.

Sunday, January 1, 2012

Baby/toddler leg warmers

How to make baby/todder legwarmer out of women's socks

This is a quick inexpensive project that anyone can do, $5 for 3 pairs of socks at Walmart. They are a GREAT alternative to tights, making diaper changes much easier. They are warmer & much more durable & can also double as arm warmers to give a warm layered look to your favorite t-shirts for girls & boys of all ages.


Supplies…
  • Women's tube/knee socks (6m-6yr) or Womens crew socks (0-18m) Girls knee socks also work GREAT.
  • Sewing machine 
  • Scissors
  • Pins

STEP 1: You will toss the heel & toe scraps, but keep the bottom of the foot. 


STEP 2: Take the section remaining from the foot & you want to fold it inside of itself as pictured below. You should have the nice side of the sock on the outside & inside with a fold on one end & both raw edges on the other.

STEP 3: Stick the long section of the sock inside your newly created tube. This would give you 3 raw edges on the side we are going to sew, the other side will have the folded edge & the finished edge that was originally the top of the sock. If you have a pattern such as stripes or argyle  you may try to get them to line up. Once you are happy with the positioning pin together. Make sure to pin just 3 layers, not all 6 or you won’t have a hole to stick your little ones leg through when you are finished.
STEP 4: Now set the stitch length on your sewing machine to 4 (longest stitch), this will allow the most stretch. If the long straight stitch just doesn’t stretch enough for you can also us a narrow zig zag stitch… width at 2 & length at 3. You want to stretch the pinned side over the arm of your sewing machine & sew a straight stitch all the way around. If you can’t get it to stretch over then you can use what ever method you use to sew circles normally, or you can simply stitch it together with a needle & thread the old fashion way. Then simply fold the trim down (putting the seam inside).

 Here they are in action!!

Diaper inserts

Make your own gDiaper insert


 instructions were based off of Jedigurl's tutorial here: http://www.jedigurl.com/crafts/patterns/Making_a_gDiaper_insert.pdf
 
Materials: I chose to use microfiber as an absorbent layer because it was easy for me to get and inexpensive. 
I bought a 34 pack of 14”x14” microfiber auto cleaning cloths at BJ's and this was enough for 17 of my inserts.  Microfiber is so absorbent that it will dry out your baby’s skin if it rubs against it, possibly causing a rash, so it’s best to cover it with another layer of fabric.

 *If are making these for a Pocket diaper you will not need to cover it. See direction at the bottom *

 I picked fleece for the top layer to provide a dry feeling for the baby. I was worried about 
my hubby possibly putting the insert in the diaper upside down, so I choose 
100% cotton solid color for the bottom layer to completely enclose the microfiber. 


PREWASH all of your fabric! 


Pattern: I made the pattern for my inserts out of paper.  (Just ignore any clipping which 
might happen at the edge of the image and print it out at 100%) The larger shape is half 
of a M/L gDiaper insert and the smaller one is half of the size small. Just place the 
straight edge along a fold in the newspaper to make it twice as long. 
M/L is 5.25” x 13”

S is 4.5 x 11


Cutting: Pin the pattern to your fabric for the top and bottom layers of your insert and cut it out. Cut out 2 layers of microfiber in 4.75” by 12.5” rectangles (4”x10.5” for smalls)Sewing: Lay the 2 layers of microfiber 
down on the WRONG side of the bottom layer, centering them.
Stitch from the edge of the bottom layer. This should be about from the edge of the microfiber. It’s important to stitch through all 3 layers the entire way around.

Trim off any microfiber that you can see from the other side of the flannel, like at the corners. Place the fleece on top of the microfiber layers, right side up. Pin in place and sew around the edges with a zig-zag stitch. 
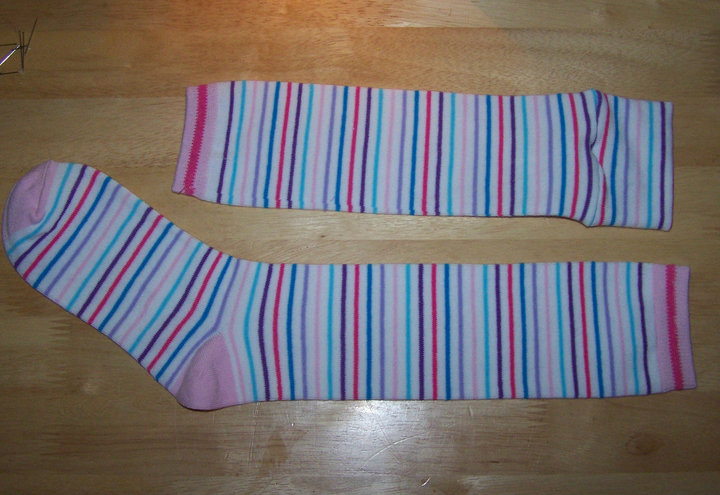
 This is what the insert looks like in a size medium/Large gDiaper.

~*~*~*~*~

Pocket diapers directions:


  You can use the same measurement as above, for this insert I wanted it bigger for an older child at night..

Once you know what size you want then you ca trace it and cut it out, I used two microfiber car shams 
(6 layers of absorbency).  

Stitch all the layers together with the zig-zag stitch. I did this one 3 layers at a time, than sewed it all together.


This is mine next a microfiber insert I bought. Enjoy!